
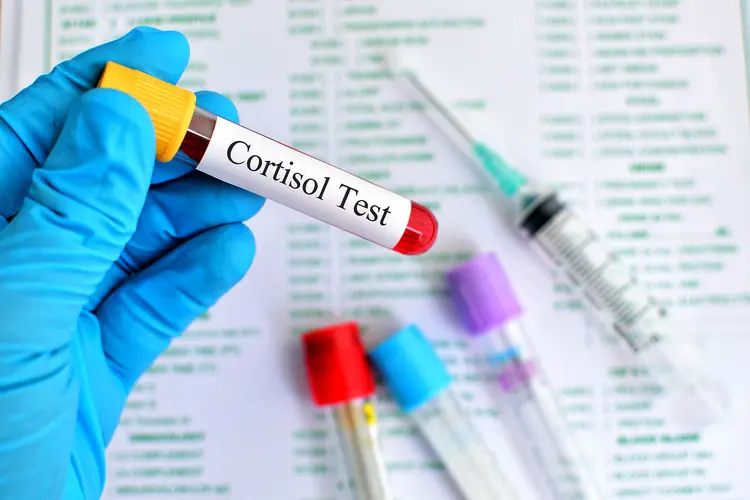
TL;DR: You can test your cortisol at home with the at home cortisol test kit from Everlywell, collect a small finger-prick blood spot sample first thing in the morning (when cortisol naturally peaks), and mail it to a certified lab using the prepaid materials in the box. Results are reviewed with input from Everlywell’s network of independent physicians, so you’re not just staring at a number with no context. No blood draw, no waiting room, no taking time off work to sit in a doctor’s office in 2026.
This guide walks through the exact steps for testing cortisol at home, what to do before you collect your sample, and how to avoid the most common mistakes that throw off results. Cortisol follows a daily rhythm, which means timing and prep matter more with this test than with most others you can run from your kitchen table. Here’s how to do it right.
What You’ll Need
- An at-home cortisol test kit from Everlywell, ordered online and shipped to your address
- A clean, flat surface to lay out your collection materials
- Alcohol wipe (included in the kit) to clean your fingertip before the prick
- A watch or phone to track your collection time, since morning timing affects accuracy
- The prepaid return mailer included in the kit
- A smartphone or computer to activate your kit and view results once processed
Step 1: Order Your At-Home Cortisol Test Kit
Ordering the kit is the step everything else depends on, and it’s also the one people rush through without reading the fine print. Everlywell’s at-home cortisol test kit ships directly to your home, and you don’t need a doctor’s referral to buy one.
When the kit arrives, don’t open it right away if you’re not planning to collect your sample that morning. The collection window matters for this specific test more than it does for something like a cholesterol panel, because cortisol levels shift throughout the day based on your body’s natural circadian rhythm. Order the kit a few days ahead of when you actually plan to test, so you’re not collecting on a rushed morning.
Register the kit online before you do anything else. This step links your sample to your account so results land in the right place. Skipping registration is the single most common reason people end up calling support asking where their results went.
Step 2: Pick the Right Morning to Collect
Cortisol peaks within about 30 to 45 minutes of waking, a pattern often called the cortisol awakening response, according to the National Institutes of Health’s MedlinePlus resource on cortisol testing. That means the day you choose to collect matters as much as the kit itself.
Pick a morning that reflects your normal routine. Don’t test the day after a red-eye flight, a night of poor sleep, an intense workout, or a stressful event, since all of these can temporarily spike cortisol and skew your reading. A typical, unremarkable morning gives you the most useful data.
Avoid caffeine, exercise, and eating before your collection window if your kit instructions specify a fasting or pre-collection restriction. Check the specific instructions included with your at home cortisol test kit, since collection windows can vary slightly by test version.
Step 3: Prepare Your Collection Area
Set out everything from the kit on a clean, well-lit surface the night before if you can. Fumbling for materials at 6 a.m. is how people contaminate samples or collect too little blood.
Wash your hands with warm water first to encourage blood flow to your fingertips, then dry them completely. Warm hands make the finger-prick step faster and less frustrating, which matters when you’re also racing the clock on your morning collection window.
Step 4: Collect Your Blood Spot Sample
This is the step that actually generates your data, and it’s the one worth taking slowly even though the kit is designed to be quick. Clean your fingertip with the included alcohol wipe and let it air dry fully before pricking, since leftover alcohol can interfere with the blood spot.
Use the lancet to prick the side of your fingertip, not the pad, since the sides have fewer nerve endings and bleed more easily. Gently massage from the base of your finger toward the tip to encourage blood flow rather than squeezing hard at the puncture site, which can dilute the sample with tissue fluid and affect accuracy.
Fill each circle on the collection card completely, following the fill lines printed on the card. Partially filled circles are the top reason samples get rejected and retesting kits get sent out, so take the extra thirty seconds to check each spot before moving on.
Let the card air dry for the time specified in your kit’s instructions, typically several minutes, before packaging it. Sealing a wet sample is another common mistake that can compromise the result.
Step 5: Package and Mail Your Sample
Once your collection card is dry, place it in the biohazard bag included in the kit, then into the prepaid mailer. Drop it in a mailbox or hand it to a mail carrier the same day you collect, since cortisol in dried blood spots is stable for shipping but delays can still affect sample quality.
Don’t let the sealed sample sit in a hot car or direct sunlight while you run errands before mailing. Heat exposure is one of the more overlooked ways a sample gets degraded before it even reaches the lab.
Step 6: Review Your Results Online
Once the lab processes your sample, results post to your online account. Everlywell connects results with input from its network of independent, licensed physicians, so you’re getting more than a raw number with no framing.
Read through the full result, not just the headline figure. Cortisol interpretation depends on the time of day you collected, which is why Step 2 mattered as much as it did. If your result falls outside the expected range, use the physician guidance included with your results to decide whether a follow-up conversation with a provider makes sense.
Common Mistakes When Testing Cortisol at Home
Testing at an inconsistent time of day. Cortisol swings dramatically between morning and evening, so an afternoon sample compared against morning reference ranges will look abnormal even when it isn’t.
Testing after a stressful or sleepless night. Acute stress and poor sleep both spike cortisol temporarily. If last night was unusual, wait for a more typical morning.
Not filling the collection card completely. Partial samples are the most common reason for a rejected test and a repeat collection.
Touching the collection area before drying. Skin oils and alcohol residue on the card can interfere with lab processing.
Mailing the sample late. Hold onto a sealed sample for days before mailing and you risk degraded results. Mail the same day.
Ignoring pre-test instructions on caffeine or food. Some collection windows call for restrictions. Read the insert that comes with your specific at home cortisol test kit rather than assuming it matches a test you’ve used before.
Tools and Resources
- Everlywell at-home cortisol test kit — the core tool for this whole process, ordered directly online with results reviewed alongside physician guidance
- NIH MedlinePlus — a reliable reference for understanding normal cortisol rhythms and what drives daily fluctuation
- A primary care provider or endocrinologist — worth involving if your results come back outside the expected range or if you have ongoing symptoms like fatigue, unexplained weight changes, or irregular sleep
FAQ
Can I really test my cortisol levels at home? Yes. An at home cortisol test kit uses a small finger-prick blood spot sample you collect yourself and mail to a lab, no clinic visit required.
What time of day should I collect my cortisol sample? Morning, ideally within the first hour of waking, since cortisol peaks shortly after you get up and results are interpreted against morning reference ranges.
Do I need to fast before an at-home cortisol test? Check the instructions included with your specific kit. Some collection windows call for restrictions on food or caffeine beforehand, so don’t assume based on other tests you’ve taken.
How accurate is an at-home cortisol test compared to a lab blood draw? Dried blood spot testing is an established collection method used across clinical labs, and accuracy depends heavily on following collection instructions correctly, particularly around timing and fill volume.
Is Everlywell’s at-home cortisol test kit available everywhere in the US? The kit ships across the US, though availability of follow-up physician telehealth consultation can vary by state due to state-specific telehealth regulations.
What happens if my cortisol result is outside the normal range? Your results come with physician guidance to help you understand what the number means, and you can use that guidance to decide whether a follow-up conversation with a provider is worth scheduling.
Bottom Line
Testing cortisol at home comes down to two things: using a reliable at home cortisol test kit and respecting the timing rules that come with how cortisol naturally behaves in your body. Order the kit ahead of time, pick a normal morning, follow the collection instructions closely, and mail your sample the same day you collect it.
Everlywell’s at-home cortisol test kit handles the lab logistics and pairs your results with physician-reviewed context, which matters for a hormone as time-sensitive and situational as cortisol. Get the timing and collection steps right in 2026, and you’ll have a far more useful result than a rushed sample collected at the wrong hour.